

By Al Brandenburg

I’m originally from upstate New York and have been vegetable gardening most of my life. One of the best crops in my garden were pole beans, which were prolific and provided some great meals. Moving to Arizona 10 years ago and becoming a Master Gardener required me to rethink what, when and how to plant my veggies based on the hot and dry climate conditions we experience here.
- Determine the right time to plant. Like most beans, pole beans get planted directly outside in spring when there is no longer a risk of frost. Pole beans can be planted here when the soil temperature reaches at least 60 F. In Arizona, unless we get a late frost, this is usually the first week of March. Surprisingly, you can also plant in early fall and get a second crop right up to first frost.
- Select the ideal location. Pole beans need full sun to grow properly and produce the highest yields, so choose a garden bed that gets lots of exposure throughout the day. Good companion plants for pole beans are carrots, eggplant and peas. Six hours of sun each day is more than sufficient.
- Build a good support. Because pole beans grow tall, they need a support to grow on. It’s easiest to build the support before planting, and this will prevent damage to the beans and roots. I use half-inch diameter PVC pipe and construct my poles in a teepee shape with about a foot and a half of distance separating each pole at the bottom. I use rope or elastic ties to connect the poles near the top.
- Inoculate the beans. Pole beans are a type of legume, and like most legumes, they require plenty of nitrogen in the soil to thrive. The easiest way to make sure they have this is by inoculating the beans with nitrogen-fixing bacteria before planting. You can order a can of this powder online or purchase it at your local garden/home supply store. The trick is to soak your bean seeds in warm water for about 20 minutes, then drain the water and place the beans on a damp towel. Sprinkle them with the inoculant powder just before planting.
-
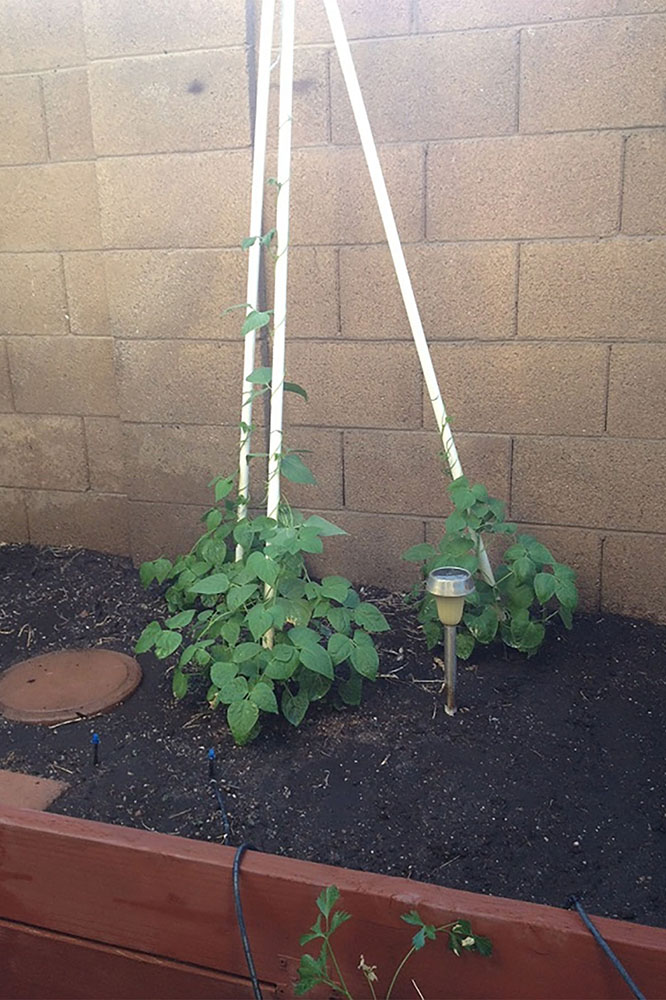
Submitted photo Plant the beans. Poke six 1-inch deep holes around each pole, and place one bean in each hole. Cover the beans loosely with soil. Pat down softly and water gently. I have found the two best bean varieties that do well here are stringless blue lake S-7 and rattlesnake. Both are available through Vermont Bean Seed Company out of Wisconsin. Warning: Do not plant in wet soil.
- Water regularly. During active growing periods like sprouting and producing pods, the beans will need plenty of water to grow. Keep the soil evenly moist when you first plant the beans and when they start developing pods. Make sure they get about an inch of water every other day, initially. As it starts heating up you will want to increase the watering frequency. At that point I usually water daily using an irrigation system on a timer but you can just use a hose if you choose. A caution here is to water gently and try to not get the tops of the leaves wet. Harvest the beans when they are about 5 to 6 inches long.
Now…sit back, say a little prayer to the garden gods, and prepare to enjoy your first crop of delicious pole beans in about 5 to 6 weeks.
Albert Brandenburg is a Master Gardener and a resident of Maricopa.
This column appears in the November issue of InMaricopa.


![An image of shredded paper. [Pixabay]](https://www.inmaricopa.com/wp-content/uploads/2024/03/shredded-paper-168650_1280-100x70.jpg "Shred-A-Thon to take place tomorrow")
